RS-485/232 Conversion Procedure
It is possible to convert any Senix sensor between RS-485 and RS-232 using the SetInterface application. BOTH USB converters are needed to successfully convert between RS-232 & RS-485.
It should also be noted that converting from the factory issued configuration will cause a discrepancy between the sensor's register value and the label on the sensor. Make sure to properly note conversions internally to avoid confusion if service is ever needed.
NOTE: SetInterface.exe should NOT be used without contacting Senix first. Please get in touch with our team before installing.
What You'll Need
• Your ToughSonic® level and distance ultrasonic sensor
• RS-485 Converter (UA-USB-485-TB) ß Green board
• RS-232 Converter (UA-USB-232-TB) ß Red board
• Power cable
• SensorView™ software
• The SetInterface.exe program
Software Installation
Download the SetInterface Executable file. Click here to do so.
Copy the SetInterface.exe file to the SensorView.exe directory—see Figure 1.
Create a shortcut to SetInterface.exe on your desktop by right clicking the file, then selecting "Send to Desktop (Create Shortcut)."
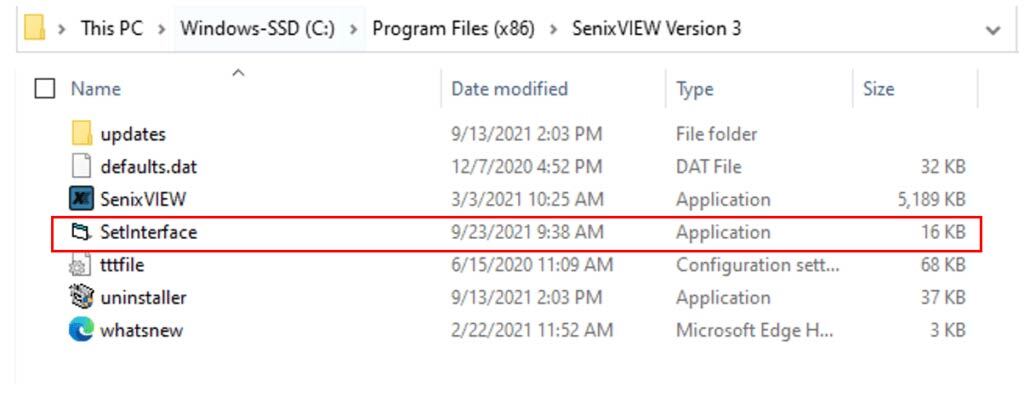
Figure 1: SetInterface.exe file path after downloading and installing
Converting from RS-232 to RS-485
Verify that the Senix sensor is connected to the RS-232 dongle properly—see Figure 2.
Run SensorView and connect the sensor to verify RS-232 communication. Close SensorView.
Run SetInterface.exe and follow the on-screen instructions to convert communications to RS-285.
Connect sensor to the RS-485 board—see Figure 3.
Open SensorView and connect to sensor to verify RS-485 communication.
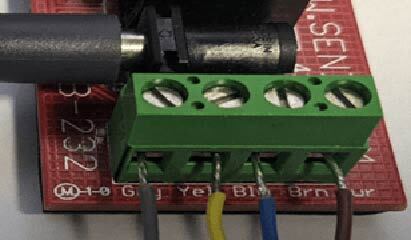
Figure 2: Proper RS-232 Connection
Converting from RS-485 to RS-232
Verify that the Senix sensor is connected to the RS-485 dongle properly—see Figure 3.
Run SensorView and connect the sensor to verify RS-485 communication. Close SensorView.
Run SetInterface.exe and follow the on-screen instructions to convert communications to RS-232.
Connect sensor to RS-232 board—see Figure 2.
Open SensorView and connect to sensor to verify RS-232 communication.
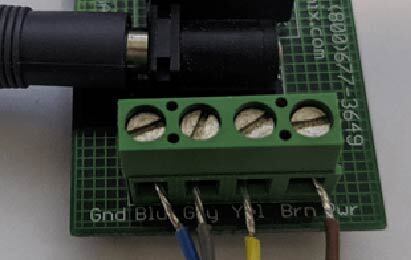
Figure 3: Proper RS-485 Connection
For questions, troubleshooting, or assistance during the conversion process, please contact the Senix team. We're here to help!